A burst pipe at 2 a.m. or a boiler breakdown on Christmas morning can turn any home into a crisis zone within minutes. Knowing which steps to take — and which to avoid — before an emergency plumber arrives can save thousands of pounds in water damage and keep your household safe. This guide walks through the full emergency plumbing timeline, from the first sign of trouble to the final invoice.
Step 1: Shut Off the Water Supply Immediately
The single most important action during a plumbing emergency is stopping the flow of water. Every UK property has a stopcock — typically located under the kitchen sink, in a utility cupboard, or near the front door. Turning it clockwise shuts off the mains supply to the entire house.
According to the Association of British Insurers (ABI), escape-of-water claims cost UK insurers over £1.8 billion in 2023 alone [ABI, 2023]. Much of that damage happens in the first 10 to 15 minutes before the water is stopped.
Key action: Find and label your stopcock before an emergency occurs. If the valve is stiff, apply a small amount of WD-40 and turn it gently — forcing it can snap older brass fittings.
For individual fixtures, use the isolation valve on the supply pipe. These small screwdriver-slot valves sit on the flexible hose feeding each tap, toilet, or appliance. Turning the slot so it sits perpendicular to the pipe shuts off flow to that fixture only.
Step 2: Assess the Situation and Document the Damage
Once the water is off, take a moment to assess what happened. Identifying the source — a burst pipe, a leaking joint, or a failed appliance — helps you communicate clearly when calling an emergency plumber and ensures the right specialist arrives.
Real-world scenario: When James, a homeowner in Sheffield, noticed water dripping through his downstairs ceiling at 11 p.m., he assumed a roof leak. After shutting the stopcock, he traced the problem to a corroded compression fitting on a bathroom radiator pipe. This detail saved the plumber 30 minutes of diagnostic time.
Document the damage before any cleanup:
- Photograph the affected area, including walls, floors, and ceilings
- Note the time the leak started and when you shut the water off
- Record any serial numbers on failed appliances
- Check whether water has reached electrical sockets or consumer units
This evidence is essential for home insurance claims. Most UK buildings insurance policies cover escape of water, but insurers require prompt notification — typically within 24 to 48 hours [Financial Conduct Authority guidelines].
Step 3: Find a Qualified Emergency Plumber
Not every plumber handles emergencies, and not every "24/7" service is genuinely available at unsociable hours. Choosing the right emergency plumber under pressure requires a quick but structured approach.
Check qualifications first
Any plumber working on your home should be registered with an approved body. For gas-related emergencies, the engineer must be on the Gas Safe Register — working on gas without registration is illegal under the Gas Safety (Installation and Use) Regulations 1998. For general plumbing, look for membership of the Chartered Institute of Plumbing and Heating Engineering (CIPHE) or WaterSafe accreditation.
Where to search at short notice
- WaterSafe directory (watersafe.org.uk): the UK's approved plumber search, backed by water companies
- Checkatrade or Trustmark: vetted tradespeople with verified customer reviews
- Your home insurance helpline: many policies include emergency cover or a network of approved contractors
Red flags to watch for
Avoid any plumber who refuses to give a written estimate, insists on cash-only payment, or cannot provide proof of insurance. The Consumer Rights Act 2015 entitles you to a service carried out with reasonable care and skill, and to a price agreed beforehand if no fixed quote is given.
Step 4: Know What Emergency Plumber Callouts Actually Cost
Emergency plumber rates in the UK vary significantly by region, time of day, and the nature of the fault. Understanding the pricing structure prevents bill shock and helps you negotiate fairly.
Callout fees cover the plumber's travel and first hour on-site. Labour beyond the first hour is charged separately. Parts are additional and should be itemised on the invoice.
Key takeaway: Always ask for a written breakdown that separates the callout fee, labour time, and parts cost. Reputable emergency plumbers provide this before starting work. If the final bill exceeds the estimate by more than 10%, you have grounds to challenge it under the Consumer Rights Act 2015.
Step 5: Temporary Fixes While Waiting for the Plumber
Most emergency plumbers aim to arrive within one to two hours. During that window, a few temporary measures can limit damage significantly.
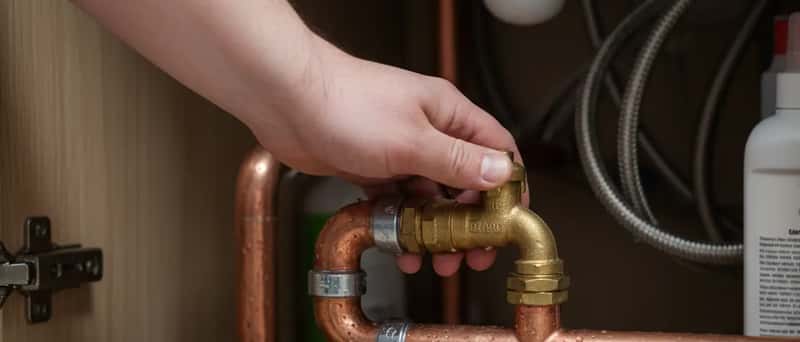
For burst or leaking pipes
Wrap the damaged section tightly with a pipe repair clamp or, if none is available, use towels secured with jubilee clips or cable ties. Pipe repair tape from any DIY shop creates a temporary seal that holds under low pressure.
For blocked drains or overflowing toilets
Stop using all water outlets. If the blockage is in a single fixture, a plunger applied with firm, consistent pressure often clears it. Never pour boiling water into a PVC waste pipe — the heat can soften joints and create a second leak.
For boiler failures in winter
If your boiler has shut down and the temperature is dropping, use electric fan heaters in occupied rooms and open taps to a slow drip to prevent pipe freezing. The Energy Saving Trust recommends maintaining at least 13°C in unused rooms during cold spells to reduce freeze risk [Energy Saving Trust, 2024].
Step 6: After the Repair — Prevention and Insurance
The repair itself is only half the story. What you do in the days following an emergency plumbing callout determines whether the problem stays fixed and whether your costs are recovered.
File your insurance claim promptly
Contact your buildings insurer within 48 hours. Provide the photographs taken in Step 2, the plumber's invoice, and a description of the cause. Under the Insurance Act 2015, you must make a fair presentation of the risk — meaning honest, complete disclosure. Most standard policies cover escape of water but exclude gradual deterioration, so the plumber's report on the cause matters.
Schedule a plumbing health check
An emergency often reveals underlying issues — ageing pipework, low water pressure, or corroded fittings elsewhere in the system. A full plumbing inspection (typically £100–£200) identifies vulnerabilities before they become the next emergency.
Build an emergency kit
Keep these items accessible: a pipe repair clamp, PTFE tape, a stopcock key, a plunger, and your plumber's contact details. The cost is under £30 and the time saved during a crisis is significant.
Disclaimer: The information on this page is provided for general guidance only and does not constitute professional trade advice. For your specific situation, consult a qualified plumber or heating engineer.